Tuesday, August 20, 2013

Glittered Picture Frame and Light Switch Cover


For the last week or so I have been busy re-doing my daughters bedroom.
She decided she no longer wanted pink, green and butterflies and instead wanted black and bright pink.
Pretty bold colors and she had some bold ideas to go along with it.
One of her ideas is GLITTER!
Lots and lots of glitter was requested.
So, I am on a quest to glitterize as much as I can without going over board. 
This is the first of my "glitter" projects.


What you will need:
 
Frame and/or Lightswitch cover
Modge Podge
Paint brush/sponge
Glitter
Newspaper

 
I am sure that there are many ways out there to add glitter to something but this worked out really well for what we were doing so here goes.
 
 
First I added a thick layer of Modge Podge to the frame and switch plate.  I did a small section at a time.


Sprinkle the glitter on generously.  Don't miss any spots.  Better to throw more on then have to go back and do it again.
Go around the whole thing and then let dry completely.
 
 
Once dry, lift up your frame or switch plate and tap off the excess glitter onto the newspaper. 
Make sure you get as much off as you can by doing this.


After I did this, I realized that some more glitter will probably come off and cause me more heartache so my solution was to put a thick layer of Modge Podge over the glitter.  This made the rest of the glitter stay in place.  Since it dried clear, you can't even tell and it made it a little smoother.


Here is the finished product.
I am very pleased with how it turned out.
  I still haven't hung up the frame but I will update with photos as soon as I do.
 
 
Cost of this project:
 
$1.38 for the frame from Goodwill
 
Glitter, Modge Podge, Brush and Switch Cover I already had on hand.


Did you make this project?  Link me to it!  I would love to see it!


Sunday, August 4, 2013

Initial Decoration


This craft is very simple and shouldn't take you much time to do at all.
You can make this craft for any season or Holiday!
 
 
What you will need:
 
A wooden letter
Scrapbook paper
Modge Podge
Foam Brush
Acrylic paint (optional)
Paint brush (optional)


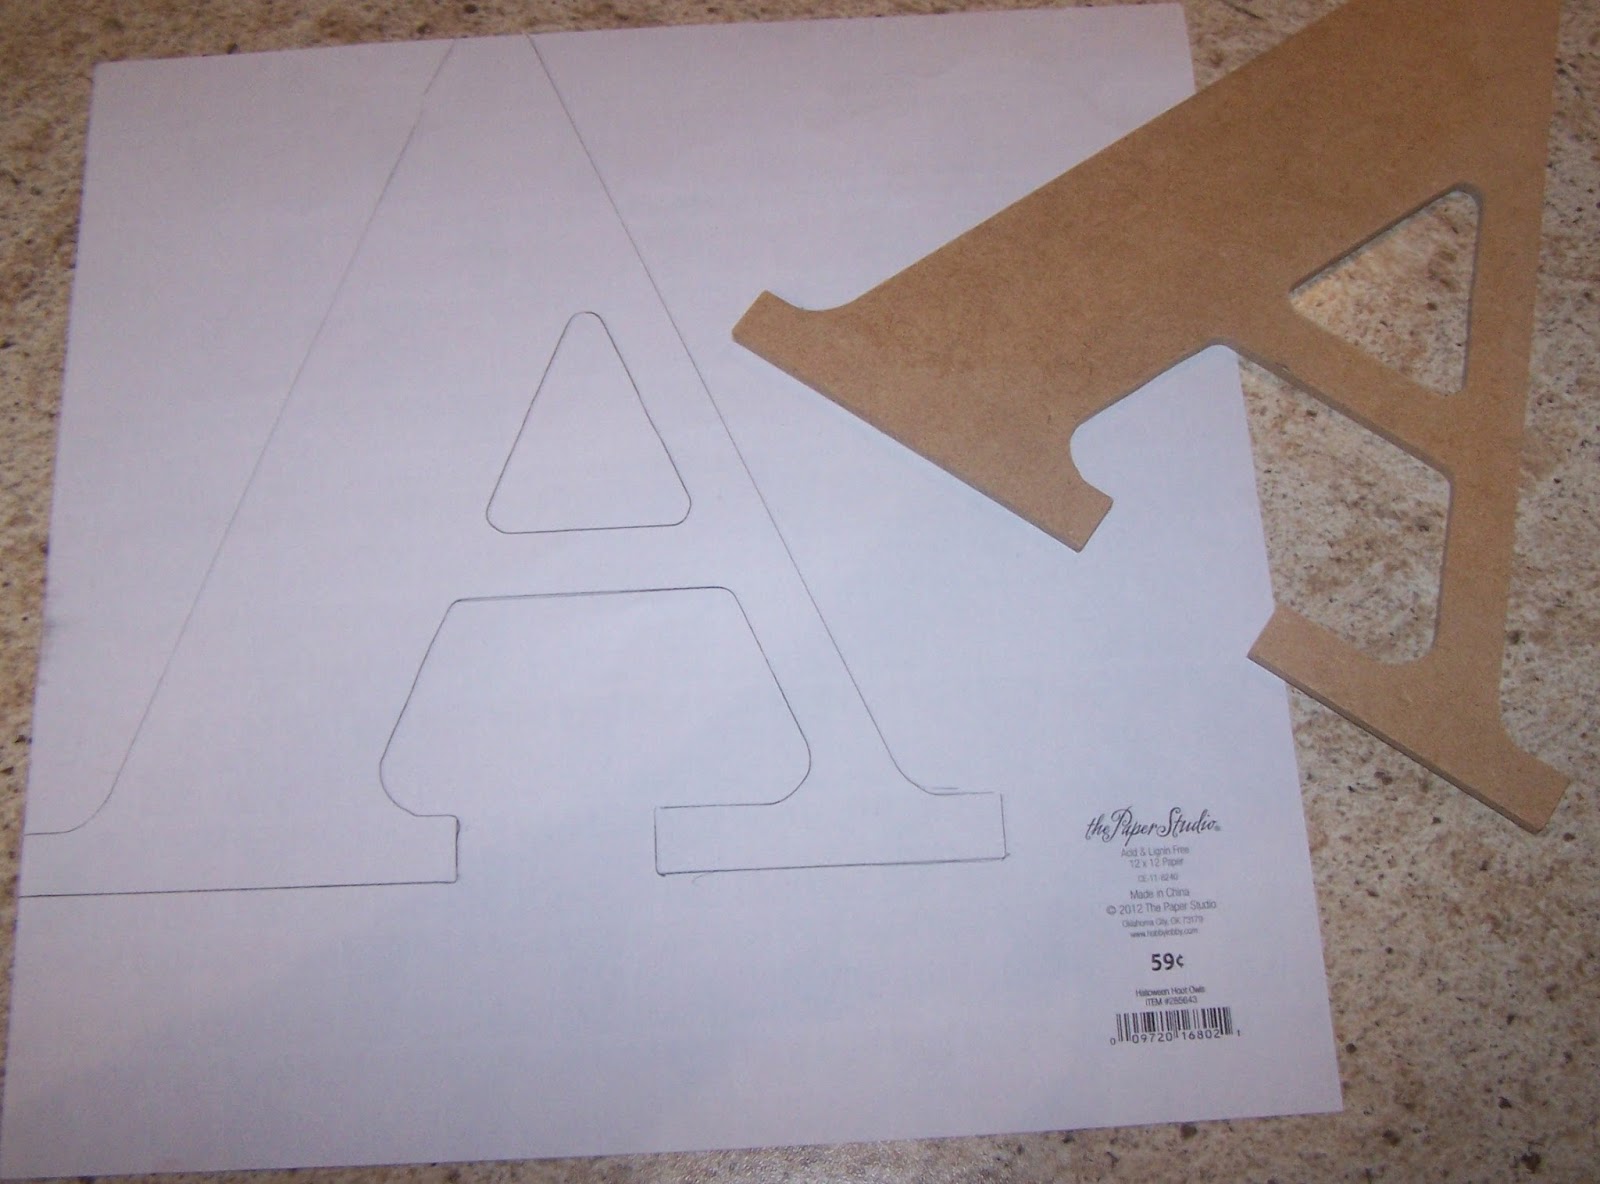
First lay out your letter backwards on the scrapbook paper.  I tried to line it up with the edges of the paper as you can see from above.
Trace around your letter.

 
Once your letter is traced, cut it out very carefully.
I cut on the inside of the line of the letter.
 
 
Once you have it cut out, make sure that it the paper lines up correctly with the wooden letter.  Trim things if you need to.
 
 
Next what I did was paint the edges of my letter.  You don't have to do this if you don't want to but I'm going to be displaying mine on a shelf so I wanted it to have a finished look since you can see the sides.
Let that dry.
 
 
Put a nice thin coat of Modge Podge on the wooden letter.


Lay your scrapbook paper down on top and smooth it out.
Let that dry.
 
 
Once that is all dry, put a thin layer of Modge Podge over the top.
Let dry.
Repeat this step so you have 2 layers of Modge Podge on it.
 
 
All that is left to do now is enjoy your finished product!
 
 
Cost of this project:
 
$1.49 for the wooden A at Hobby Lobby (I used a 40% off coupon)
$0.59 for the scrapbook paper at Hobby Lobby.
 
Modge Podge, Brushes and Paint I already had on hand.
 
 
Did you make this craft?  Link me to it!  I would love to see it!


Friday, August 2, 2013

Friday, July 26, 2013

Fingerprint Fall Tree Canvas


The weather was cooler outside today and I got in the mood to do a Fall craft with my youngest.
This was really easy to do and my daughter had a blast making it with me.  Too bad my oldest refuses to do things like this with his Mom.  It's those darn teenage years I guess.
 
 
What you will need:
 
Acrylic Paint (brown, red, yellow, orange and green)
Paint Brush
Canvas


First I started out by creating the tree.  I just free-handed it.

 
Paint your little ones finger and have them start putting on the leaves.

 
There is no certain way to do this.  We just started putting them on and then we went back in and started filling in spots that were empty.  Keep going until you have your desired look.
Be sure to date the back and add your childs name!
 
 
Cost of this project:
 
Nothing. 
I already had the paint, paint brush, the canvas from here and of course the little fingers. 
 
 
Did you make this craft? Link me to it! I would love to see it!  


Sunday, June 30, 2013

Patriotic Handprint Shirt


With the 4th of July coming up, I thought it would be nice to make one of these t-shirts with my youngest.  I found it over here on CraftyErin
 
 
What you will need:
 
White T-shirt or tank top
Red and Blue Paint
Painters Tape (optional)
Paint Brush
Dish to hold paint
Cardboard
 
 
This is a pretty straightforward project and it was easy enough that my daughter was able to do this by herself (well mostly).
First you are going to want to lay out your shirt and place the cardboard on the inside of it so that the paint doesn't soak through.  I didn't have any fabric paint so I used acrylic paint.  I plan on only handwashing this shirt so it shouldn't be too much of a problem.
 
 
Paint your childs hand.  This of course is my daughters favorite part.
 
 
Firmly press their little hand down in the upper right part of the shirt.
Let this dry.
 
 
After that dried, I started making stripes out of painters tape.  I did this so that it would be easier for my daughter to paint straight lines by herself.
 
 
Paint between the tape with the red.
Let dry.
 
There you have it!  Easy and fun to do. 


Cost of this Project:
 
$3.47 for the shirt at Walmart
 
Paint, Brush, and painters tape I already had on hand.


Did you make this craft? Link me to it! I would love to see it!


Saturday, June 29, 2013

Candy Bouquets

Are you in need of a cute gift for someone?  This is great for any age and any occasion.  I made these for Father's Day but you could easily change it up for a different holiday.


What you will need:
 
Candy of your choice
Tissue Paper
Small Wooden Dowels
Scrapbook Paper
Printer (optional)
Container of some sort
Floral Foam
Hot Glue Gun


I bought enough supplies to make 2 bouquets.
First you are going to want to unpack all of your candies and get your hot glue gun plugged in.
The containers I used for this I found at Walmart and they are actually pencil holders.  You could use any container, bucket or pot you want for this project.


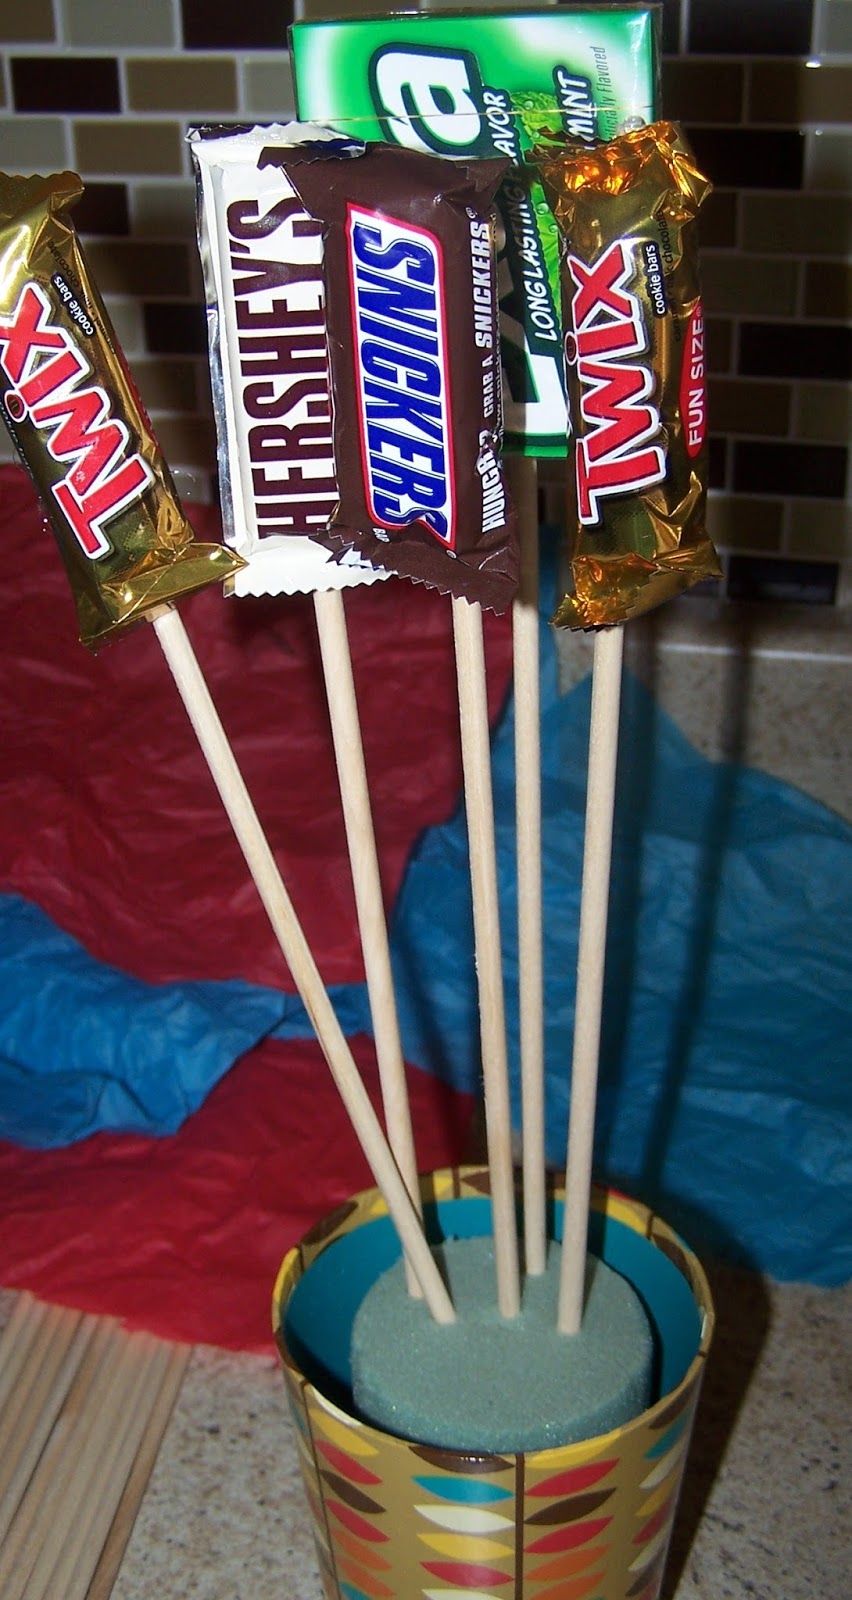
Place a line of hot glue on the top of one of the dowel rods.  Line up a candy bar and hold for a few seconds to make sure it sticks.  I used the fun sized bars but you could used regular sized ones if you want to.
 
 
Keep going until you have used up all of the candy bars.
 
 
Now that you have finished with all of that, place your floral foam into your container.  Start putting in the dowel rods into the foam to make your bouquet.  I put some of mine in at angles so the bouquet would look fuller.
 
 
Once I had that done, I stuffed some tissue paper down in the container so that you didn't see a bunch of dowel rods.
 
 
Dress it up with a little sign to finish it off.
 
 
These were a HUGE hit with my Hubby and Dad.  They were really easy to do and my daughter had a lot of fun helping me make them.
 
All supplies came from Walmart except for what I had on hand.
 
Total cost for this project which will make 2 bouquets:
 
$8 for the Candy (fun sized bars)
$1 for the Containers ($0.50 each on clearance)
$1.94 for the Dowel Rods ($0.97 each)
$1.97 for Floral Foam
 
Tissue paper, hot glue, and scrapbook paper I already had on hand.
 
 
Did you make this project?  Link me!  I would love to see it!