Sunday, December 2, 2012

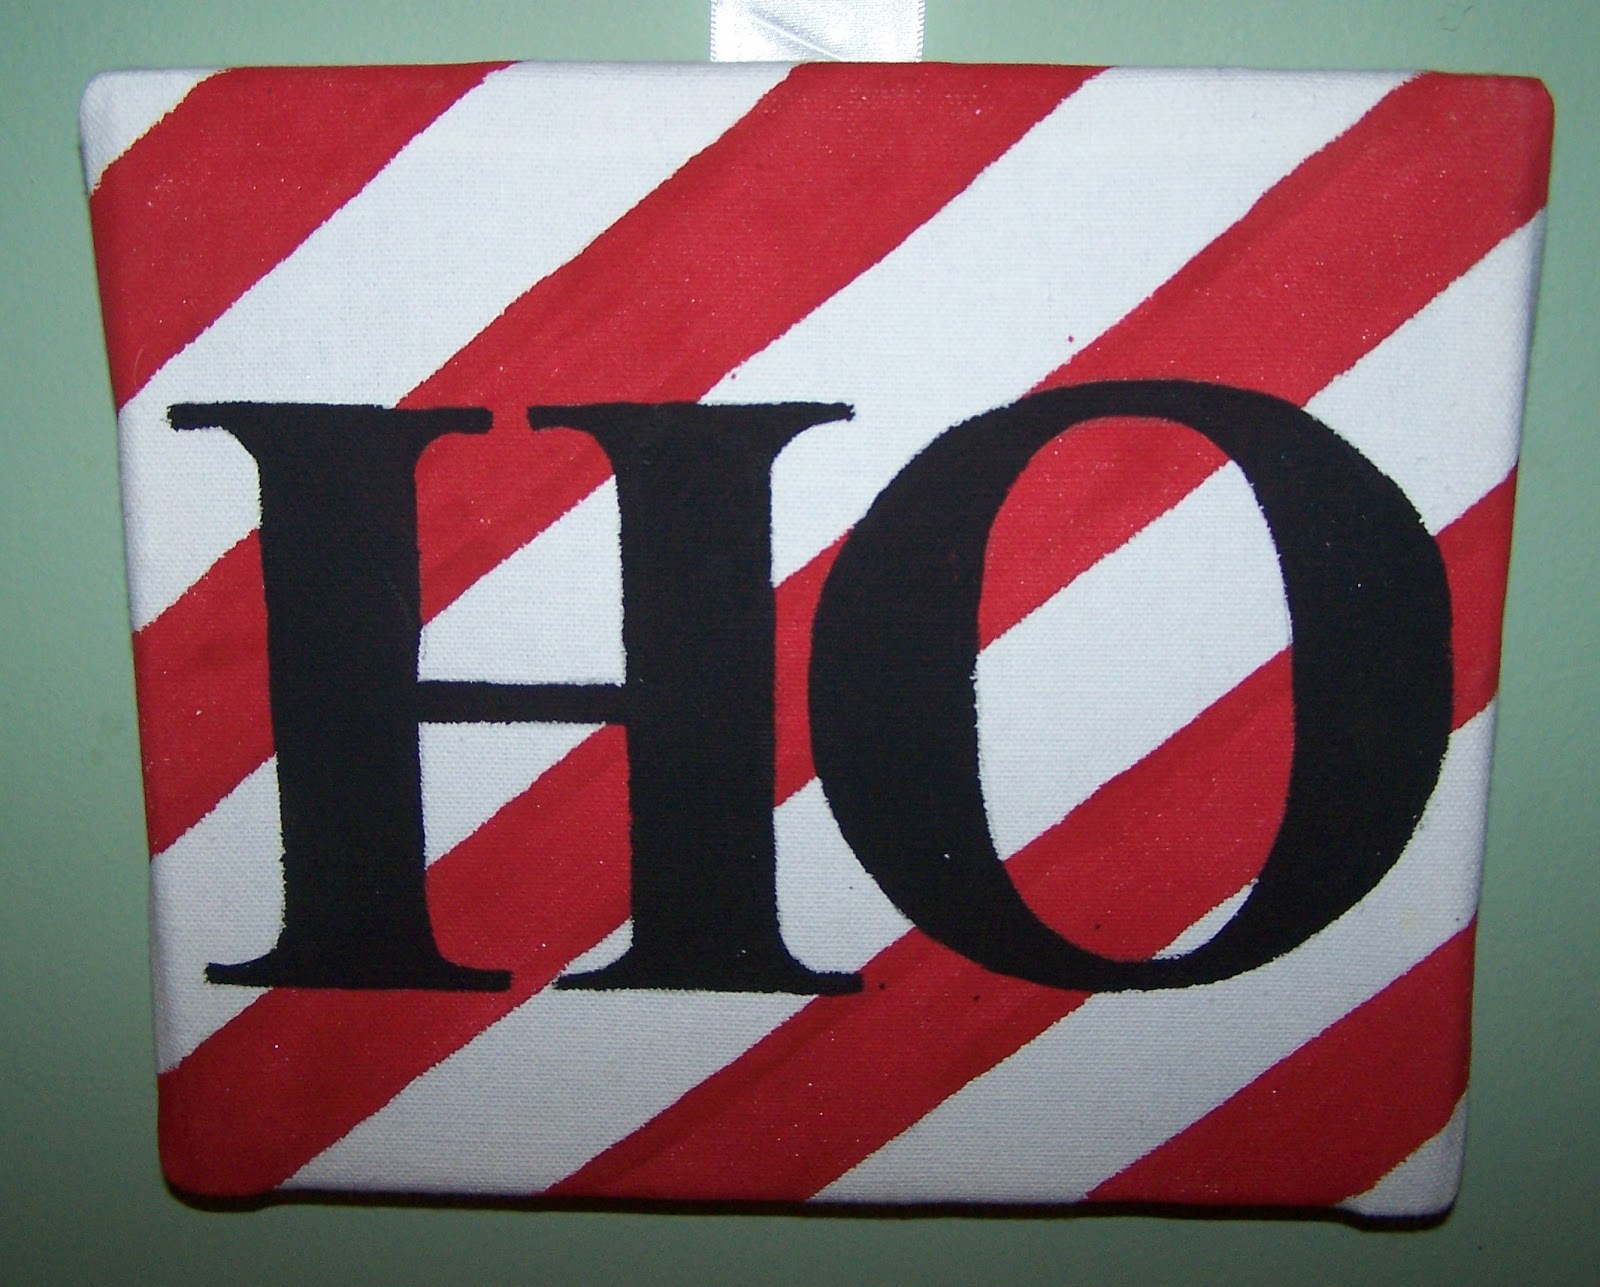
Ho Ho Ho Christmas Canvas


It's been awhile since I've posted a craft here.  I've been super busy over at The Ladybug Landing the last few weeks.  I was able to throw this together though.
 
What you need:
3 canvases
ribbon
acrylic paint (red, green and black)
staple gun
stencil (optional)
quarter (optional)
 
As I was making this craft, I forgot to take pictures of the process.  Hopefully it's easy enough that I can just walk you through it though.
 
First what you are going to want to do is layout your design that you are going to want to paint on your canvases.  I choose stripes and dots.  I used a ruler to make the stripes and a quarter to make the dots.  Just lightly make pencil marks so you can see your design.
Paint your designs on and let that dry.


Next you are going to want to make your letters.  If you don't have a stencil big enough, you can make one on the computer which is what I did.  I just printed it out on paper and then cut them out.  Again, trace around them lightly with pencil so you can see where you need to paint.
Paint and let dry.
 
Now you can add your ribbon.  Layout your canvases face down on a counter top or the floor.  Space them evenly apart.  Take your ribbon and run it across the back of the canvases.  Staple them down with your staple gun.
On your top canvas, you are going to want to staple a ribbon to each corner of it.  Make sure they are long enough to create a bow.
Tie your bow and hang up your new creation!
 
Simple as that.
I have gotten quite a few compliments on this project.  You could even do different variations of this and for different holidays.
 
Cost of this project:
Nothing.  I had everything on hand already.   I just used the canvases from this project that my sister had left here.
 
Did you make this project?  Link me to it!  I would love to see yours!


Wednesday, November 28, 2012

DEAD DEAL! York Photo: Custom Desk Calendar for only $1!


SORRY THIS DEAL IS NOW DEAD!
Right now you can score a custom desk calendar for only $1 over at York Photo from now until December 15th.
This would make a really cute Christmas gift!
So head on over here and sign up for a new account.
Create your calendar and use the promo code 1DESK.
You will have to pay for shipping which was $3.99 for me but you can't beat a custom Christmas gift for less than $5.


Saturday, November 24, 2012

DEAD DEAL! Toys R Us $20 Groupon for just $10!

 SORRY THIS DEAL IS NOW DEAD!
 
Here is an awesome deal that you aren't going to want to pass up!
You can recieve a $20 Groupon for just $10! 
Head on over here to get yours today.
With the holidays coming up, this will come in handy.
There are some restrictions so make sure you read the fine print.

What is Groupon?
Groupon is a "deal-of-the-day" site which sells coupons and gift certificates that are redeemable at local and regional businesses. Each day, Groupon offers a new deal for each specific locale. Groupon typically offers deals related to dining, concerts, museums, tickets, and more. 

Monday, November 12, 2012

Cinnamon Stick Wreath


Ready for some Christmas crafts?
 
What you will need for this project:
Wreath Form
Cinnamon Sticks
Ribbon
Hot Glue
 
 
My wreath form came from Dollar Tree
The ribbon came from Family Dollar
The cinnamon sticks came from Hobby Lobby


This wreath form was a little too thick so I cut it in half and made two.


Start by gluing the end of your ribbon to the form.
 
 
Wrap it around the form until you get all the way back around.  Glue that end down.
 
 
Now you can start adding the cinnamon sticks.  Glue them down to the form.
Once you have made it all the way around with the cinnamon sticks, go back in with another layer over all the empty spots.
 
 
I had a little extra ribbon left over, so I made a bow to give it a little extra something.
 
 
Cost of this project:
$1 for the wreath form
$1 for the ribbon
$2.98 for 3 bags of cinnamon sticks ($1.99 each with 50% off)
 
Hot glue I already had on hand.


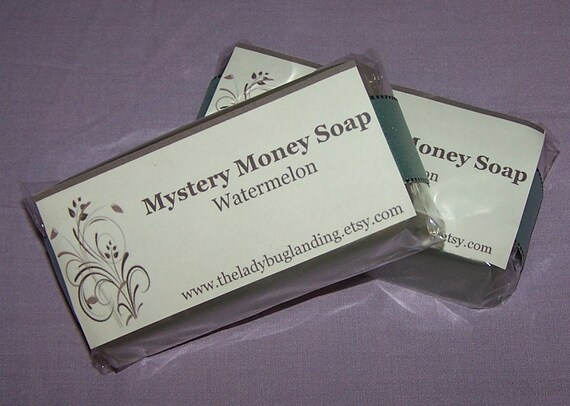
Mystery Money Soap Stocking Stuffers

Are you looking for stocking stuffers?  Well, these are perfect for any age!
 
Handmade Real Money Soap Mystery....you choose scent
 
Each bar of soap contains one bill ranging from $1 to $50.
The mystery is the fun of this soap. 
There are tons of different scents and they come in either green bars or clear bars.
 
Head over here to the Ladybug Landing and have a look.

Sunday, November 11, 2012

DEAD DEAL York Photo: 20 Holiday Photo Cards for Under $5


SORRY THIS DEAL IS NOW DEAD!
CHECK BACK LATER FOR MORE DEALS!
 
If you still need to order your holiday cards, now is the time to do it.  York Photo is offering an amazing deal right now.  You can get 20 4x8 cards plus envelopes for under $5 shipped to your door!
 
Here's how it works, add 20 4x8 photo cards to your cart.  Use coupon code 1CARD at checkout.  This will bring your total down to $1.  Shipping was $3.49 for me so my grand total ended up being $4.49.
  You can also score 40 free prints while you are over there!  All you have to do is pay the shipping which was $2.74 for me.
 
So head over here and get started!
 
This deal is for new customers only and expires on 11/15!


Wednesday, November 7, 2012

DIY Fall Leaves Canvas Craft


My sister recently found this craft from Revolutionaries on Pinterest and wanted to make one of her own.  Here is how she did it.
 
 
What you will need to create one like hers:
 
2 8x10 canvases
3-5 different colors/patterns of scrapbooking paper
glue
scissors
toliet paper or paper towel rolls
branches
 
 
First you will want to pick out your scrapbook paper.  She chose fall like colors with no patterns.
 
 
Next you are going to want to cut out some leaves.  To do this, you just take one of your paper towel rolls and kind of smash it down.  Cut off pieces approx. 1/2 inch wide.  There is no set number as to how many leaves you will need to cut.  Go with what you think looks right for your canvases.
 

Glue them down to your scrapbook paper.
Let these dry completely.
 
 
While those are drying, cut up your branch and lay them out on the canvas.  Again, there is no certain way to do this.  Just go with what you think looks best.
Once you have them where you want them, glue those down.
Let dry.
 
 
Now you can add in your leaves.  I would suggest laying them all out first before glueing them down.
 
I love the way hers turned out.  In fact, I will probably be making one of my own here really soon.
 
 
Cost of this project:
 
$1 for 5 pieces of scrapbook paper at Micheals
 
The branch we found outside and the cavases came from a previous project.  Everything else we had on hand already.


Sunday, November 4, 2012

S'mores Treats


These are so good and so addicting!
You've been warned. 
 
1/4 cup butter
1 (10.5 oz) bag of mini marshmallows
1(16 oz) box Golden Grahams Cereal
1 to 2 cups of milk chocolate chips
 
In a large microwavable bowl, melt butter.  Add in the mini marshmallows.  Heat at 30 second intervals and stir inbetween.
Once the marshmallows turn to a sauce, add in the cereal.  Mix well until all the pieces are covered.
Stir in the chocolate chips. 
Put mixture into a greased 9x13 pan.
Press them down. 
Allow to cool before cutting them. 
 
Enjoy!!!! 


JCPenny Kids Free Haircuts

 
JCPenny is now offering free haircuts to kids!
  Starting today, they will offer the haircuts every Sunday for children K-6th grade.
This promotion should be good at any location but you will need to make sure with your store first.  Appointments are also required.


Saturday, November 3, 2012

Reusable Chore Card Checklists


I just love how my children "forget" to do their chores.  To solve my dilemma, I made these little babies.  While I was at it, I made some for myself to make life easier.
I'm not sure why but I seem to get more things done if I have a checklist right in front of me.
 
Anywho, what you will need to complete this project:
 
A printer and printer paper
Self Laminating 5x7 sheets
Dry erase marker
Eyelets (optional)
Ribbon (optional)
 
 
What you will want to do first is make a list of all of your chores you want to include on your checklist. 
I did mine by daily for each room, then weekly chores to complete, along with a chore card for each child.
Below you will find some ideas for your everyday cards.
 
Sweep Floors
Mop Floors
Wipe down surfaces
Take out garbage
Pick up any clutter
Load/Unload dishwasher
Shake rugs
Wipe out microwave
Wipe down counters
Take laundry to laundry room
Replace hand towels in bathroom
Straighten rugs
Disinfect handles
Make beds
Put clean laundry away
ect.
 
For my weekly chore cards I have things like:
Deep cleaning the bathroom 2x a week
Wash bedding
Mop all floors 2x a week
Vacuum carpets
Wash windows
Sort/Treat Laundry
Laundry 2x a week
Wipe down walls
Plan a weekly menu
Make a shopping list
Throw away 7 things
Dust
Clean out fridge
and a spot for any additional things I want to get done that week


Once you have an idea of what you want on your card, type it up and print it out on your computer.  Cut them down to a 5x7 size to fit in your laminating sheets.
 
 
I used the Scotch brand ones and they worked out really good.  They were very easy to use.  Just read the directions on how to use yours as other brands may be different.  I got the glossy kind so that it would work best with the dry erase markers.  I put 2 lists together back to back so that I could save laminating sheets.


Once I was done with that, I put some eyelets in so that I could run a ribbon through and hang them up.
 
 
Once your done using them for the day, just wipe off the dry erase marker and hang them back up for the next time.

I have them hanging right on the pantry door so that the kids will see them everyday and there won't be any more of the "forgetting". 
 
 
Cost of this project:
 
$5.34 for the laminating sheets at Walmart
Printer paper, ink, marker, eyelets and ribbon I already had on hand.


Tuesday, October 30, 2012

Spooky Halloween Glowing Eyes


YAY!  Finally Halloween is here.  I have one more last minute craft for you to do.  This is really easy to do and super cheap.  I plan on putting these in my bushes on the side of the house.  However I can't take credit for thinking these up, there are lots of them floating around the internet.
 

What you will need:

Toliet Paper Rolls or Paper Towel Rolls
Green and White paint
Glow Sticks
Paint Brushes
Scissors or Exacto Knife
 
 
First take all the little bits and pieces of toliet paper and paper towels off of the rolls.  I personally used toliet paper rolls since they were shorter. 
Cut out the design of the eyes that you want.
 
 
Next I painted mine with a watered down green on the outside to blend in with the bushes.  On the inside I painted it white so that the glow sticks would be brighter.
 
 
I found these packs of 15 glow bracelets at the Dollar Tree.
I put one glow stick in each roll.  You will have to bend them so the ends don't hang out.  You can put 2 sticks in there if you would like yours to be brighter.
 
 
Next just hide them where ever you want and let the spookiness begin!
 
 
Cost of this project:
 
$2 for the Glow Sticks at Dollar Tree
 
Toliet paper rolls, green & white paint, paint brushes, scissors and the exacto knife I already had on hand.
 
Update:
These were a huge hit!  I tried to get some pictures of them in the bushes but it was harder than I thought.


Tuesday, October 23, 2012

Apple Cider Funnel Cakes


Yeah, I'm in trouble with this one but I just couldn't help myself.  These are so good.  I found the recipe over here at Heather's French Press.  I changed it up a little bit to go with what I had on hand.
 
Here is what I did:
 
2 Cups Flour
2 Eggs
3/4 Cup Milk
3/4 to 1 Cup Apple Cider
1 Tsp. Baking Powder
1 Tsp. Cinnamon
1/2 Tsp. Nutmeg
1 Tsp. Vanilla
1/2 Tsp. Salt
Oil for frying
 
Heat oil in pan.  Combine your dry ingredients.  Add in your eggs, milk, apple cider and vanilla.  Your batter should be like pancake batter.  If it's not, add in more liquid (I would suggest more cider for more flavor)  Once oil is heated, swirl batter in pan.  I just used a measuring cup and poured it in slowly.  Fry until they are golden brown.  Flip over and fry on the other side.  Drain them on paper towels.  Let cool a few minutes and then sprinkle them with powdered sugar and cinnamon.   


Monday, October 22, 2012

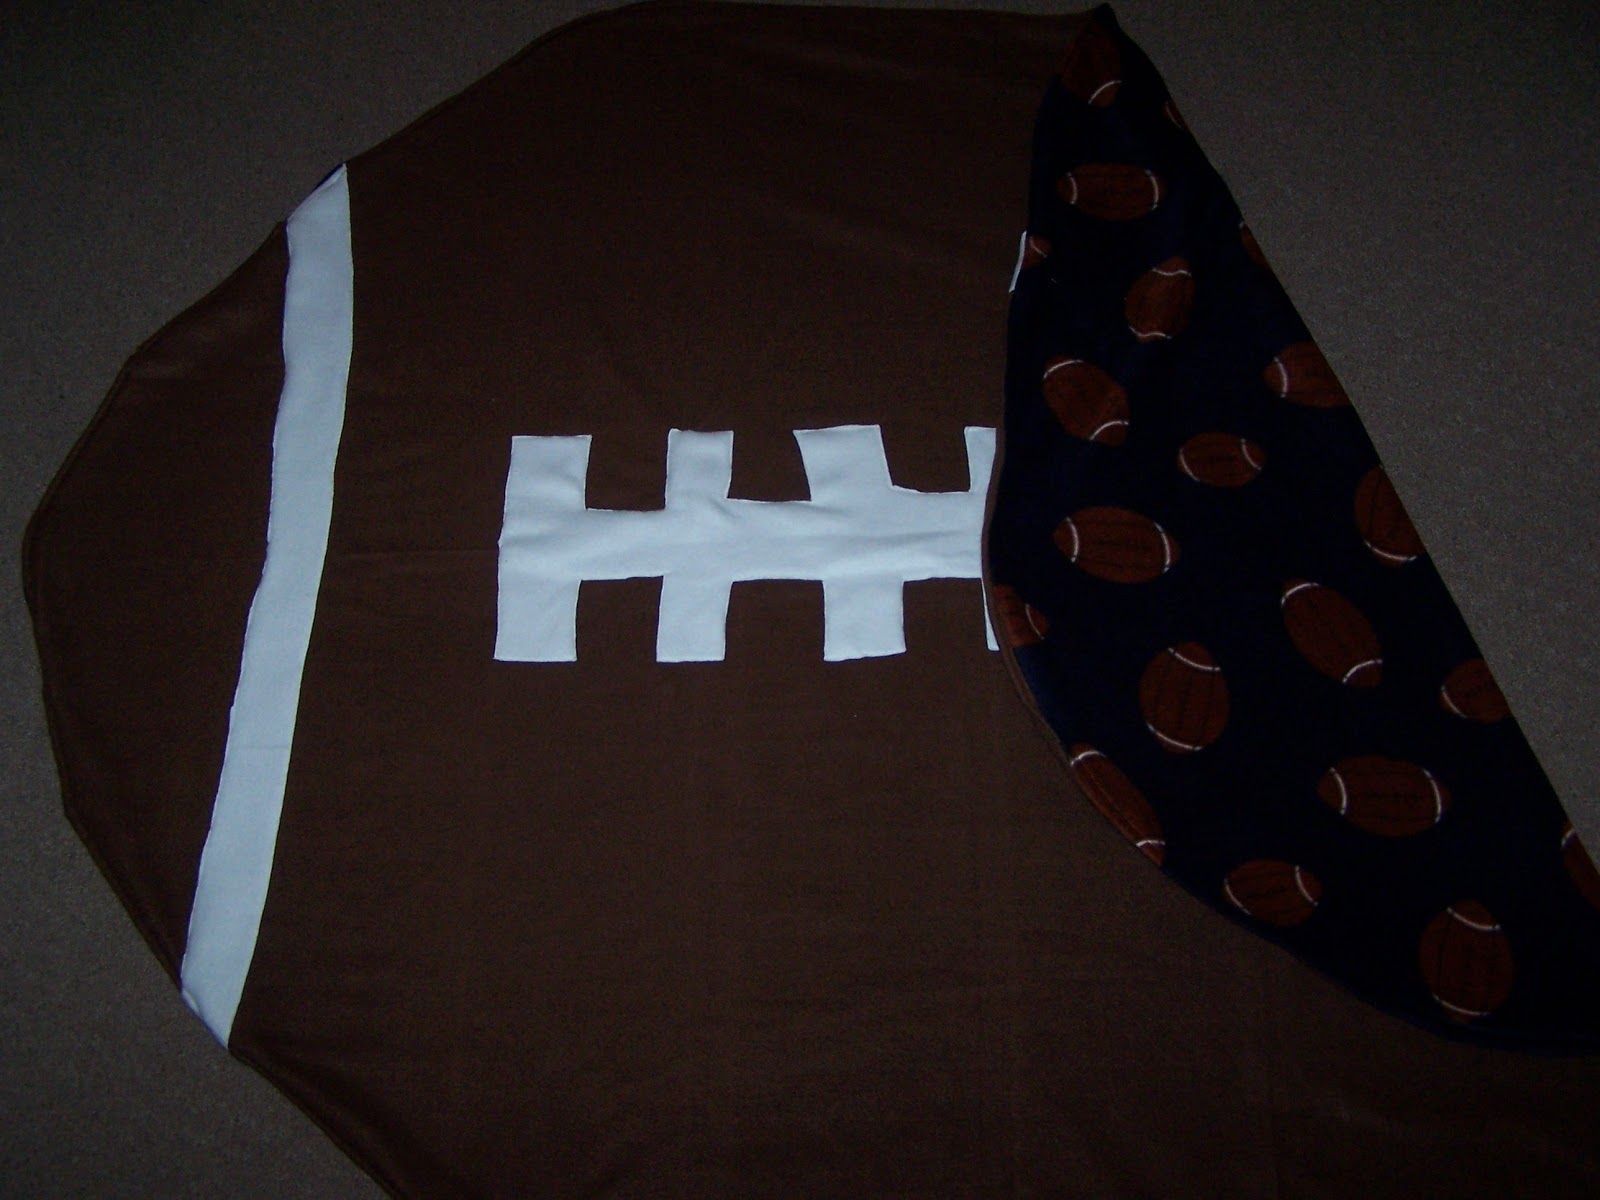
DIY Football Blanket


This year for Christmas I have decided to do mostly handmade gifts for family and friends.  First on my list was this football blanket from Thriving Home for my son.  His room is done in a football theme so this was perfect.
 
 
What you will need to make one like mine:
2 yards brown fleece fabric
2 yards designed fleece fabric
1/2 yard white fleece fabric
straight pins
sewing machine


I made mine basically the same way she did however mine is much bigger. 
When I was down at Hancock Fabric the other day they were having a huge sale on fleece so that is what I decided to make his out of.  You can save another 10% with them if you sign up for their text messages and you can combine that with their sale.  They also accept competitors coupons.
This blanket was super easy to make.  I finished it in 2 nights without any problems.
 
 
I think he is going to love it.
 
 
Cost of this project:
 
2 yards brown fleece $7.18 ($3.99 a yard, minus my 10% off text)
2 yards football fleece $10.78 ($5.99 a yard, minus my10% off text)
1/2 white fabric $1.79 ($3.99 a yard, minus my 10% off text)
 
Thread, straight pins and sewing machine I already had.
 
For less than $20 this is a really nice blanket.  It's thick and warm.  I'm sure he will have it for years to come.


Friday, October 19, 2012

Christmas Planner


Christmas is right around the corner so I thought it was time for me to get organized.  I am one of those people who likes to have lists so that I remember everything otherwise I end up buying the same things over and over again.  Usually I just use a notebook dedicated to Christmas but this year I found these awesome printables over at Bella Caiden and Life Your Way.
 
What you will need for this project:
 
3-ring binder
Dividers
Hole Punch
Printer/Paper/Ink
 

I bought a red binder and left it plain.  I didn't want to advertise to my kids that this was my Christmas binder because I knew that they would be peeking otherwise.


On the inside these are my categories.  You could use different ones but this is what is easiest for me.
 
1.  Baking- A list of recipes and who I am baking for.
2.  Made with Love- Handmade gifts that I want to to make, who they are for and when I want them completed by.
3.  Ideas- I have a page for every person with ideas for gifts and stocking stuffers.
4.  Internet- This is to keep track of all of my internet purchases.  I buy alot on Amazon every year with my Swagbucks and other sites so this will help me make sure I get all of my shipments.
5.  Stockings- This is where I write down all the stocking stuffers that I have purchased for each person.
6.  Gifts-  I have one page for every person that I am buying for this year.  I write down the gifts that I have already purchased, where I bought it from, how much it cost, if  I need to purchase anything else to go with that gift and if I have wrapped it yet.
7.  Receipts- In the back of my binder I have an envelope to put all my receipts in for the gift that I have purchased in case I need to return or exchange something.
I still need to add a section for Christmas Cards that I will be sending out.
 
 
This really has already made a HUGE difference as far as being organized goes.  Hopefully this season won't be quite as stressful because I have it all right here in my handy dandy binder.
 
 
Cost of this project:
$1 for the 3-ring binder from Dollar Tree
$1 for the dividers from the Dollar Tree
 
Printer, paper and ink I already had.

Don't forget to include your mailman/mailwoman, newspaper delivery person, bus driver, teacher, coaches, neighbors, ect.  I seem to always forget at least one of them every year no matter how hard I try not to.